
Teach lesson
Basic Arduino 4/4: build a mini-controller
Students combine a potentiometer, servo, and LED to design a mini-controller with analog input, a decision, and visible output.
Sign in with an educator account to prepare a class session. Students join with a class code.
New to LabsLand? Create your teacher account
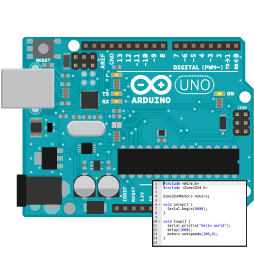
Learning Outcomes
Combine analog input, conditionals, and two outputs.
Use the Servo library in a simple program.
Explain the behavior of a programmed system.
Student activity preview
Activity Content
Preview only. In a class session, students can fill in responses and submit their work to the teacher.
Design before touching the code
8 min
You have three pieces: potentiometer 1, a servo, and LED 1. In this project, the potentiometer will control the servo position, and the LED will act as a warning when the servo passes a certain angle.
The servo angle goes from 0 to 180 degrees. A low threshold such as 60 degrees would turn the LED on early, near the first third of the movement. A threshold of 90 degrees would turn it on halfway through. A higher threshold such as 120 degrees would turn it on only when the servo is already in the final third of its movement. Before programming it, choose the threshold that would make the LED useful for the kind of warning you want.
Arduino Uno's default analog-to-digital converter uses a 0-1023 scale for 0-5 V. This laboratory's potentiometer reaches 3.3 V, approximately reading 675. The program calibrates that practical maximum to the servo's full 0-180 degree range.
At what angle would you turn the LED on: 60, 90, 120 degrees, or another value? Explain why that threshold would be useful.
Program the controller
22 min
Now compare your idea with this solution: the potentiometer controls the servo angle from 0 to 180 degrees, and LED 1 turns on when the angle goes above 90 degrees. Upload the program. Then change the condition so the LED turns on only above 120 degrees. The key line is in the if: do not change the LED pin or the servo pin unless you know why.
#include <Servo.h>

const int pot1 = A0;
const int servoPin = 3;
const int led1 = 8;
const int potMaxReading = 675;

Servo servo;

void setup() {
  pinMode(led1, OUTPUT);
  servo.attach(servoPin);
}

void loop() {
  int reading = analogRead(pot1);
  int calibratedReading = constrain(reading, 0, potMaxReading);
  int angle = map(calibratedReading, 0, potMaxReading, 0, 180);

  servo.write(angle);

  if (angle > 90) {
    digitalWrite(led1, HIGH);
  } else {
    digitalWrite(led1, LOW);
  }

  delay(20);
}
Open the Arduino lab.
Upload the base program and observe the servo.
Turn potentiometer 1 slowly.
Change
angle > 90toangle > 120and upload again.Save before capturing the code.
Now set the condition to your chosen warning threshold. Keep the strict
>comparison: the LED is off at the threshold and on above it. Test positions below and above it; trace the equality case in the code. Save this final program.
Submit your code
After testing 120 degrees as a shared example, submit the saved final code with your chosen threshold. State the threshold and the observed LED states below and above it. Explain what the strict > comparison does at equality. Save main.ino before attaching its code snapshot.
Wrap up the project
10 min
Explain the system using these three words: input, decision, and output. You can include what you would improve if you had more time.
Turn this preview into a live class session
Continue to LabsLand Teach to use this lesson with your students and review the access available to your account.
New to LabsLand? Create your teacher account